 Selectrum
User guide
Everything you need to create a wallet, receive and send bitcoin, and keep your funds safe. Screens in this guide show a demo wallet with sample data.
New to Selectrum?
Start with Create a wallet, then Receive and Send.
Already have a seed phrase?
See Restore a wallet. Both BIP39 and Electrum phrases work.
Just looking around?
You can watch an address without any keys, or explore with a public address.
Create a wallet
- Open Selectrum. In the first window enter a name for the wallet file and click Next.
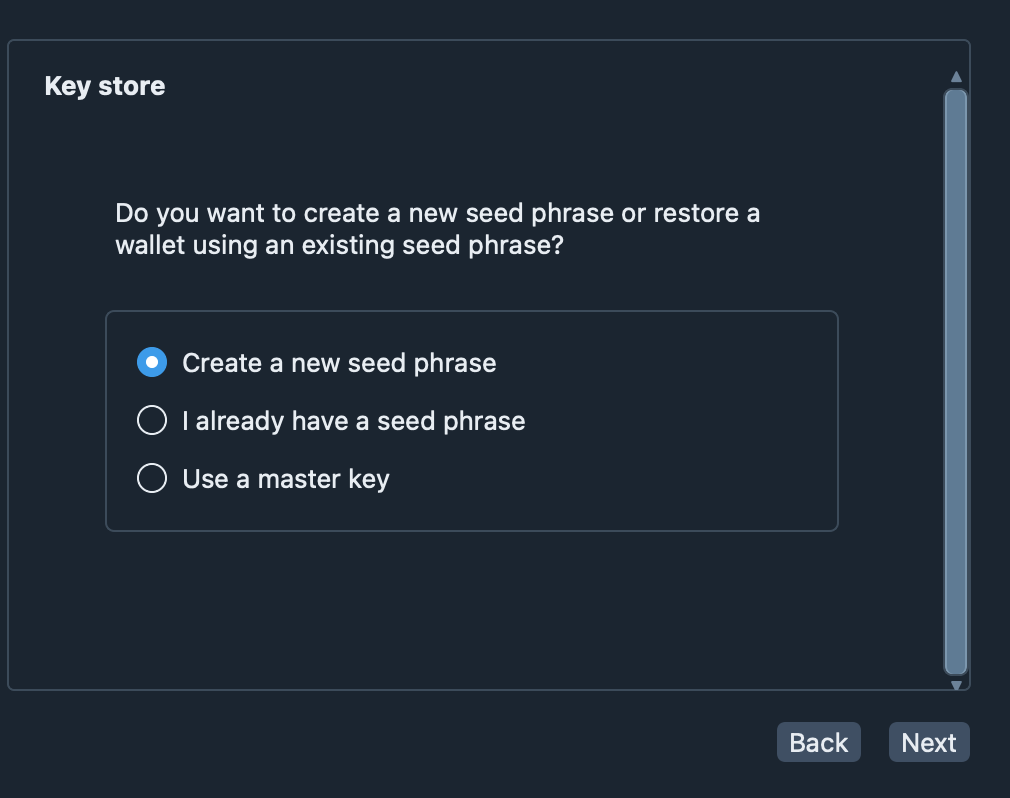
- Choose Standard wallet, then Create a new seed phrase.
- Write the twelve words on paper, in order. They are shown once; anyone who has them controls your coins.
- Type the words back to confirm that you copied them correctly.
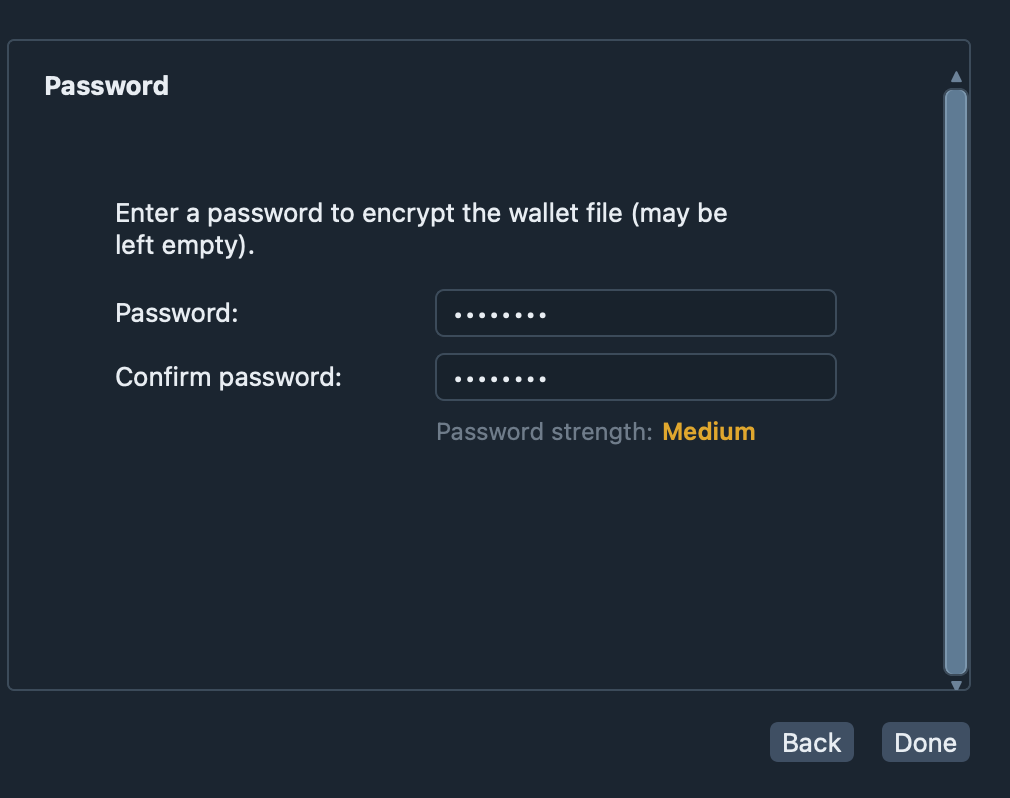
- Set a password. It encrypts the wallet file and is asked again before every payment. Done opens the wallet.
Do not photograph the words and do not store them in a notes app or in the cloud.
Restore a wallet
- In the wizard choose Standard wallet and I already have a seed phrase.
- Type or paste the words. Suggestions appear as you type, and the checksum is verified.
- Open Options if your phrase has an extra passphrase (“custom words”) or is an Electrum phrase rather than a BIP39 one.
- Set a password for the new file on this computer.
Balances and history are rebuilt from the blockchain. Notes and saved requests exist only in the original wallet file.
Watch-only wallets
To follow a wallet without being able to spend from it, create a wallet and choose Import Bitcoin addresses (one address per line), or Use a master key and paste an extended public key (xpub, ypub or zpub). The status bar then shows [view only] and the Send tab cannot sign.
Receive bitcoin
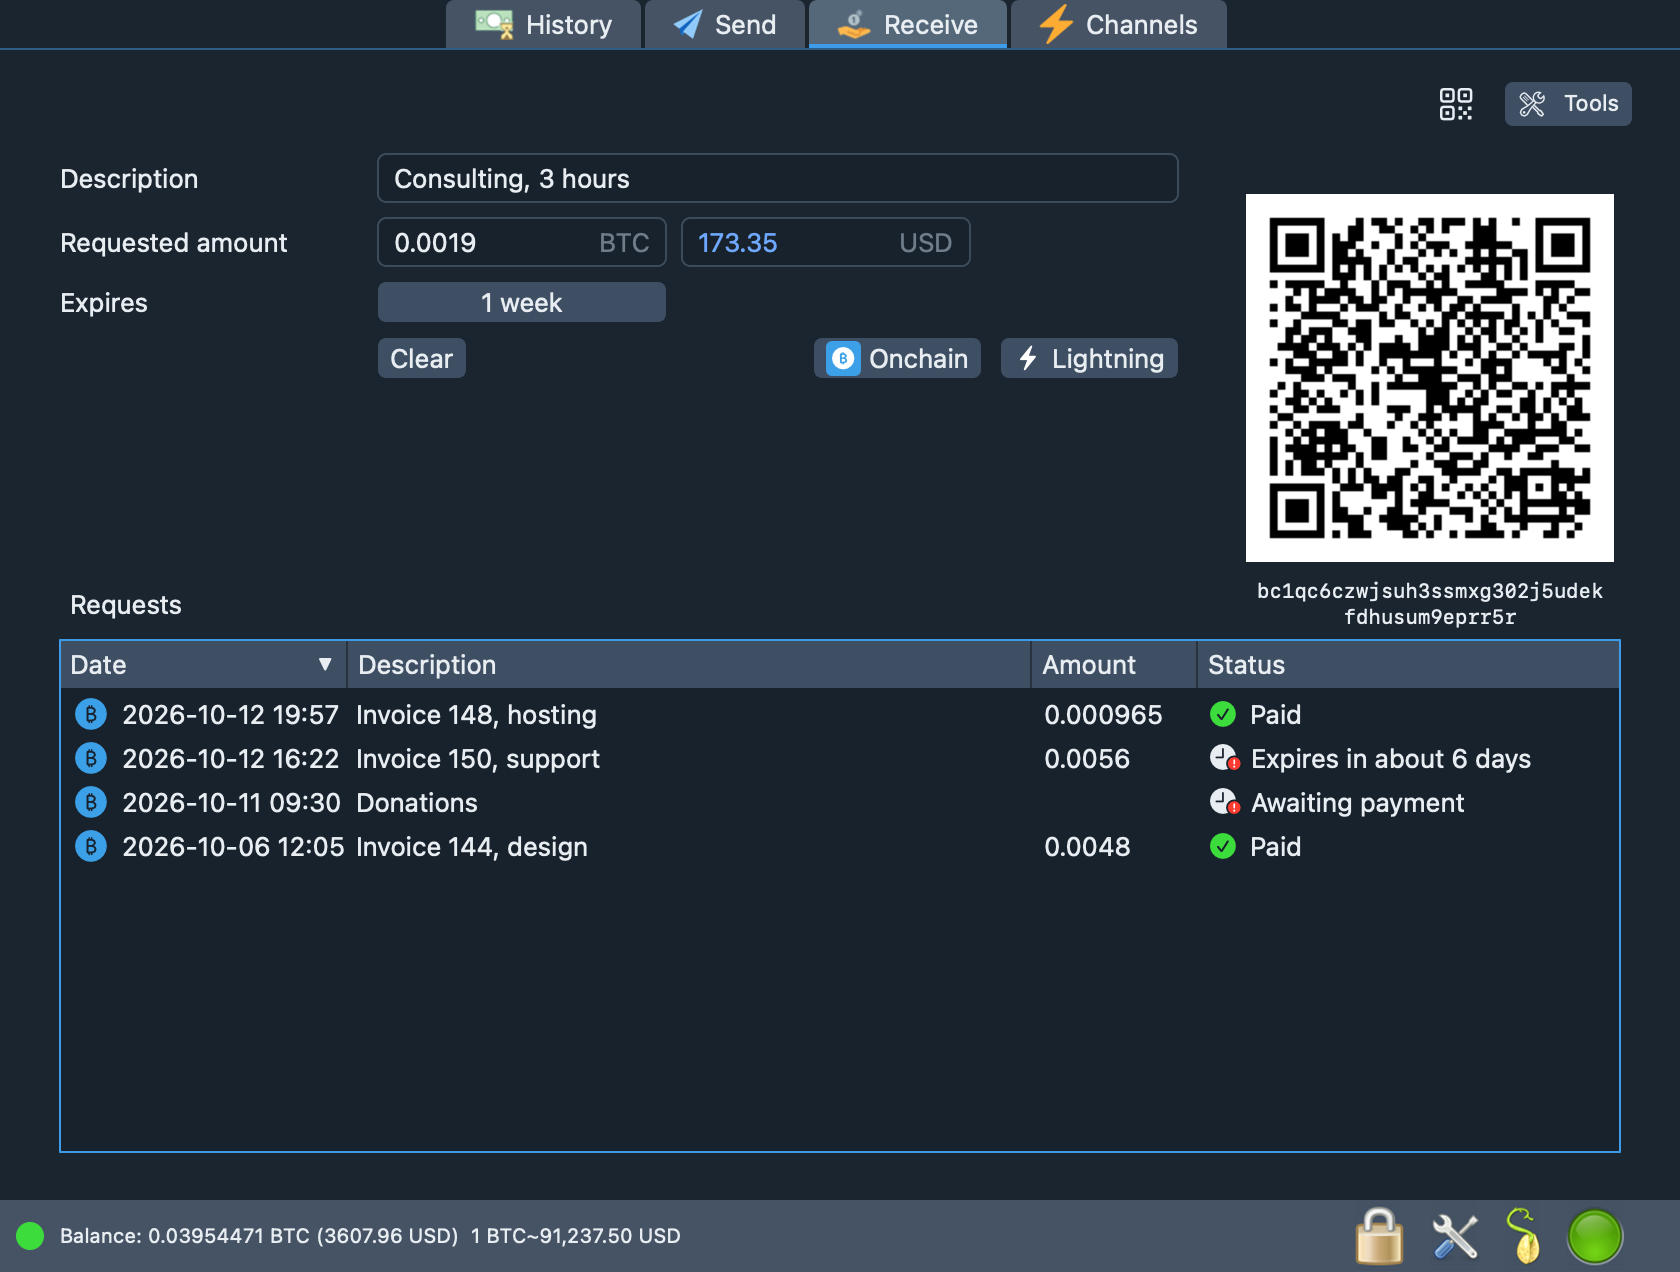
- Open the Receive tab.
- Optionally type a description and an amount (in bitcoin or in fiat) and choose when the request expires.
- Click Onchain. A request appears in the list and the QR code shows its address.
- Show the QR code or copy the address and give it to the sender.
The status of each request updates by itself: waiting, expires in…, partially paid, paid or expired. Tools → Clear expired requests tidies the list.
Send bitcoin
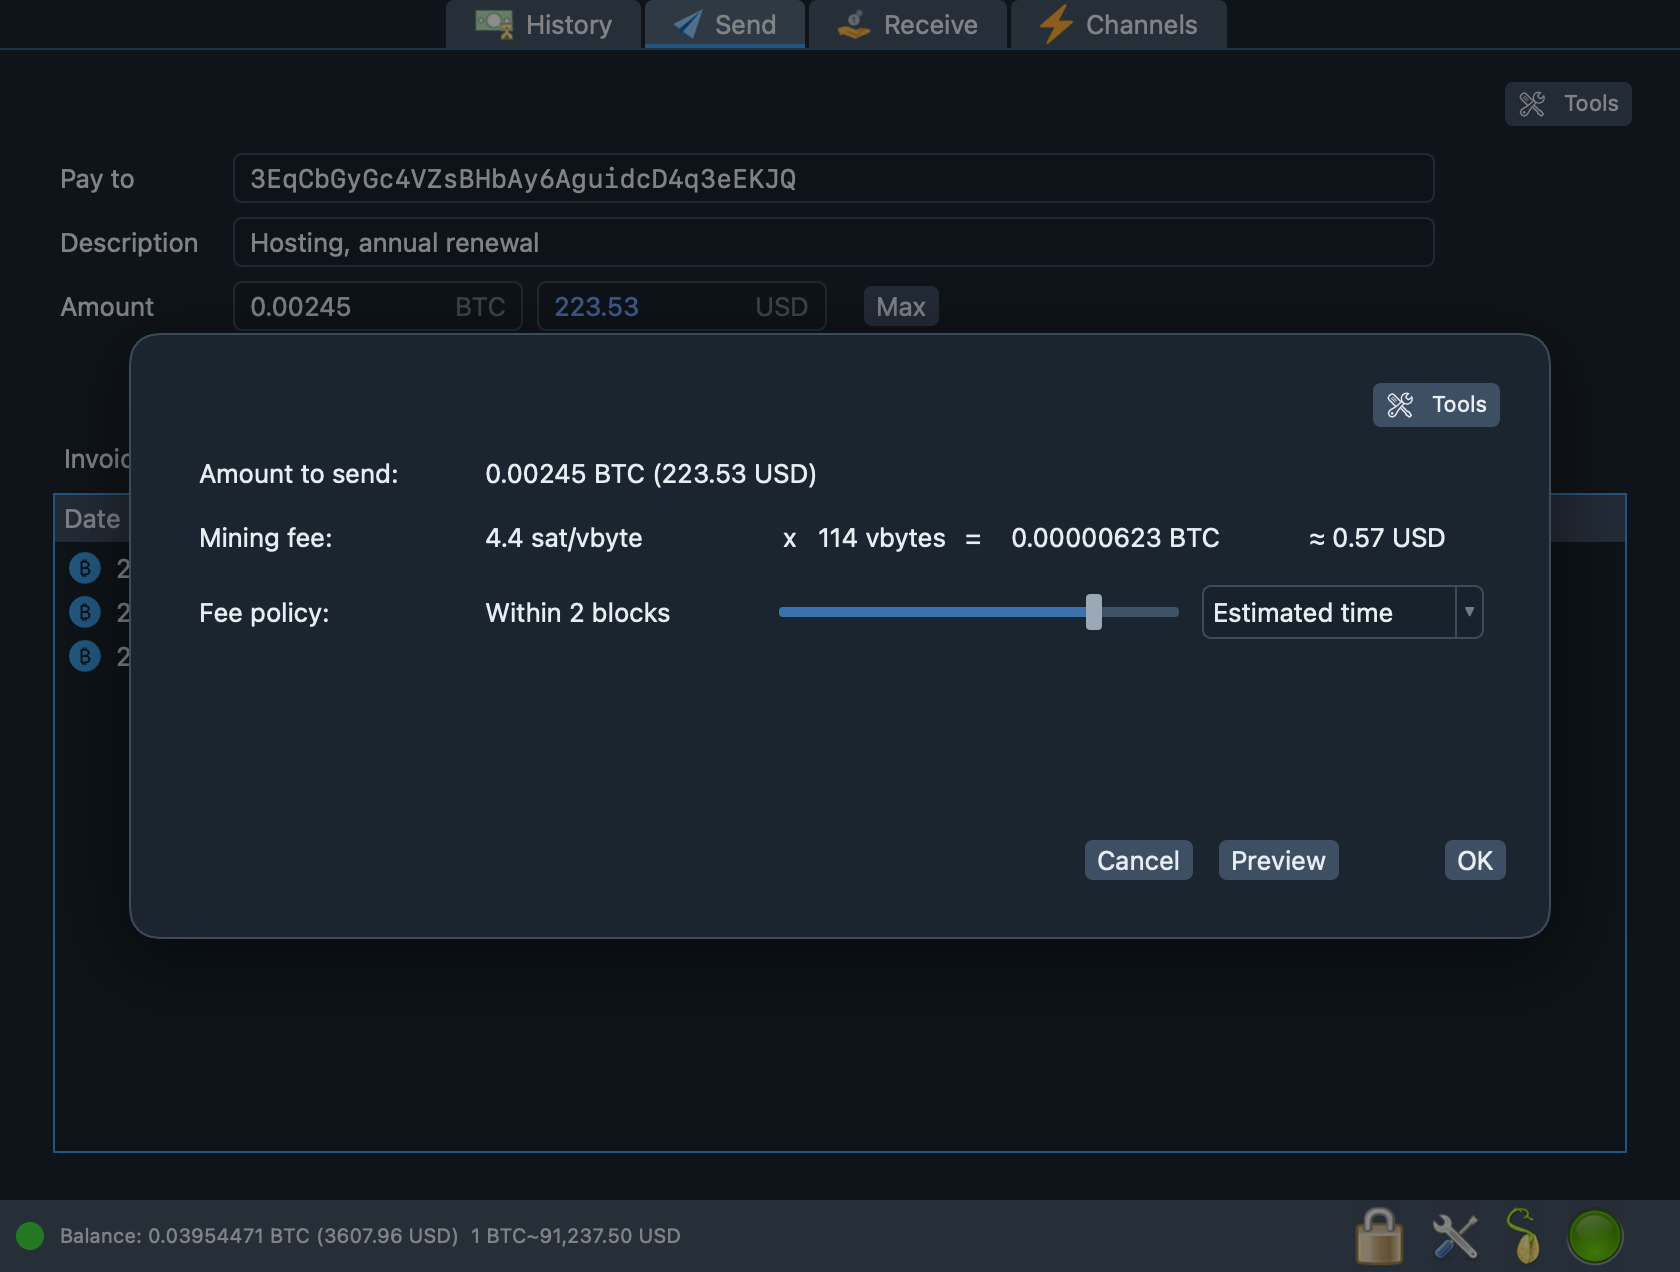
- Open the Send tab. Type the recipient’s address or click Paste to use a
bitcoin:link. - Add a description for your own records and enter the amount. Max sends everything.
- Click Pay…. Choose how fast the payment should confirm; the fee is shown in bitcoin and in fiat.
- Optionally click Preview to inspect the transaction, then OK and enter your password.
Always compare the address in the dialog with the one you were given. Save keeps a payment in the Invoices list to pay later.
History and details
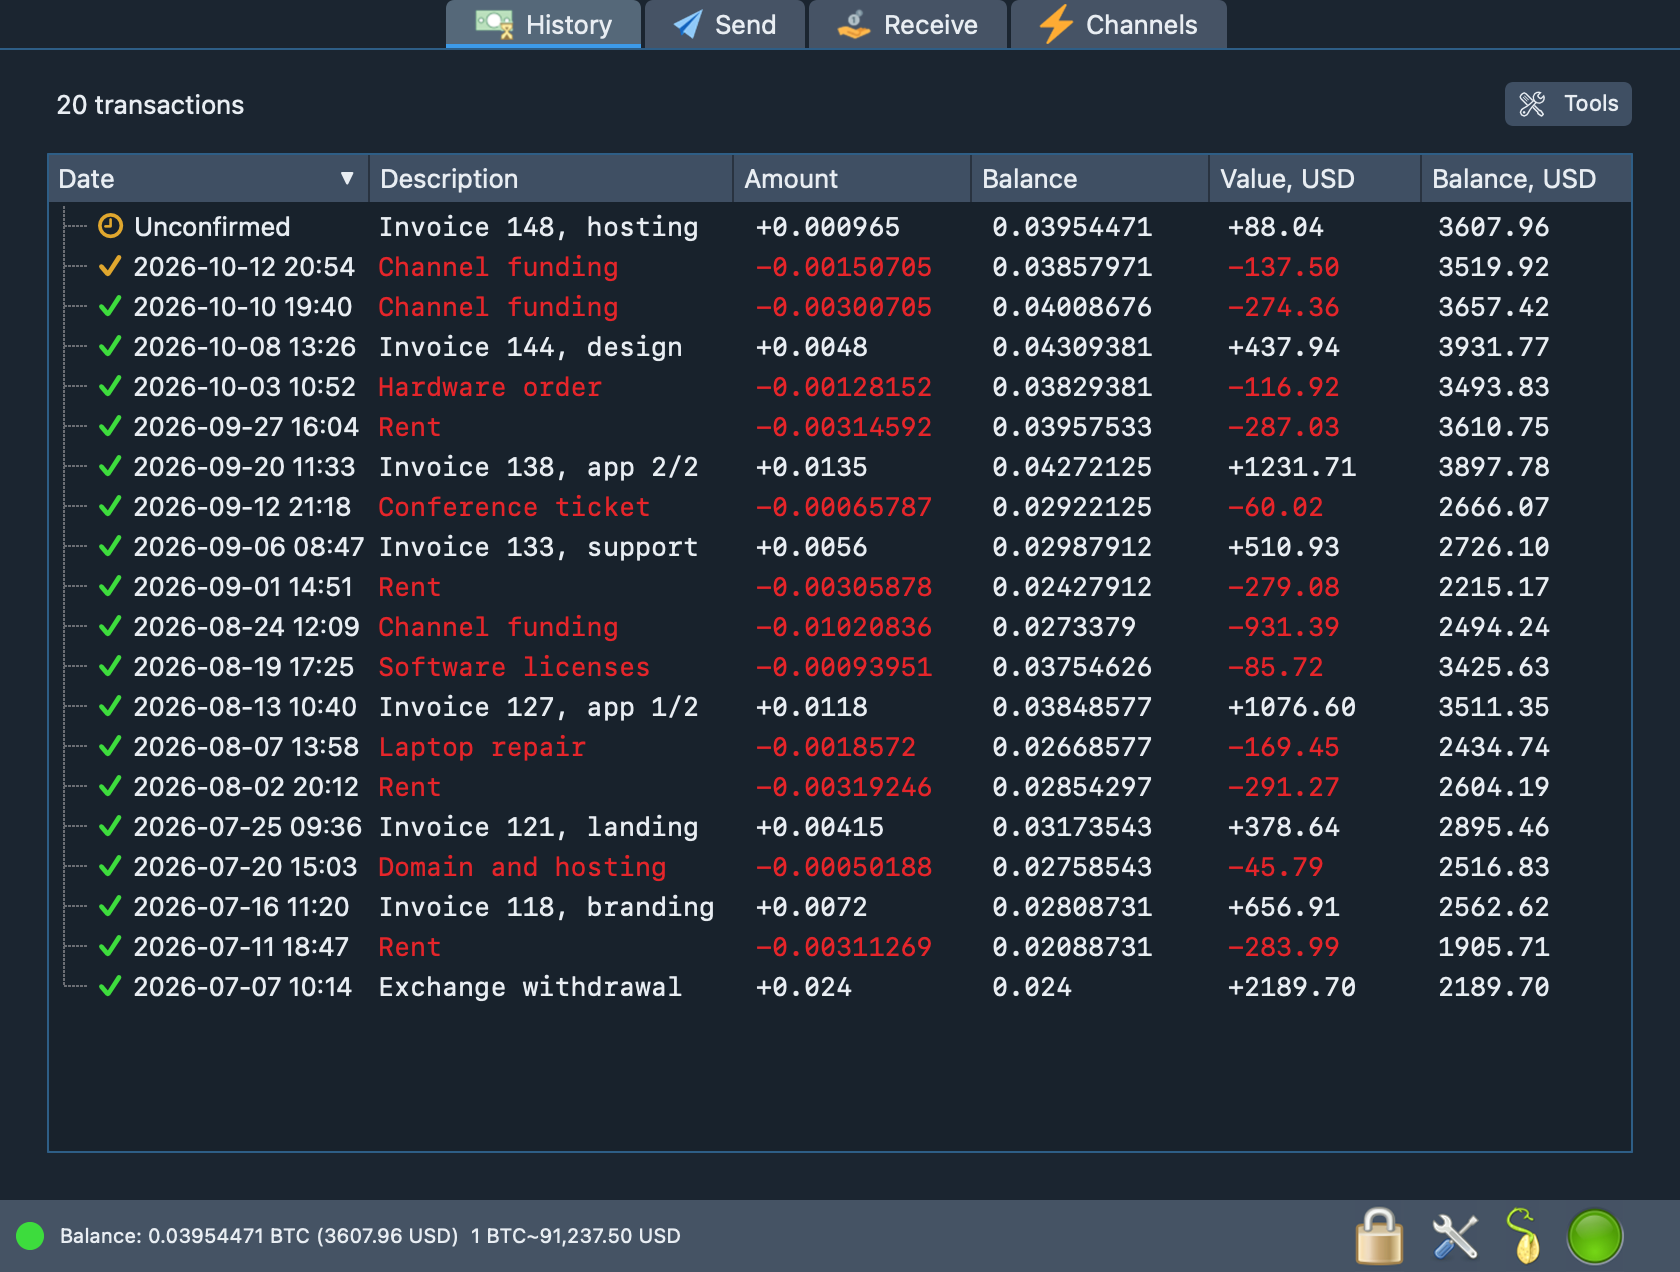
The History tab lists every transaction with its date, description, amount and running balance. Double-click a row to open the details: inputs, outputs, fee rate, confirmations. You can edit the description at any time.
Tools offers a date filter, fiat columns, a summary, a balance chart and CSV export. Click Unconfirmed rows to follow a payment until it confirms.
Lightning channels
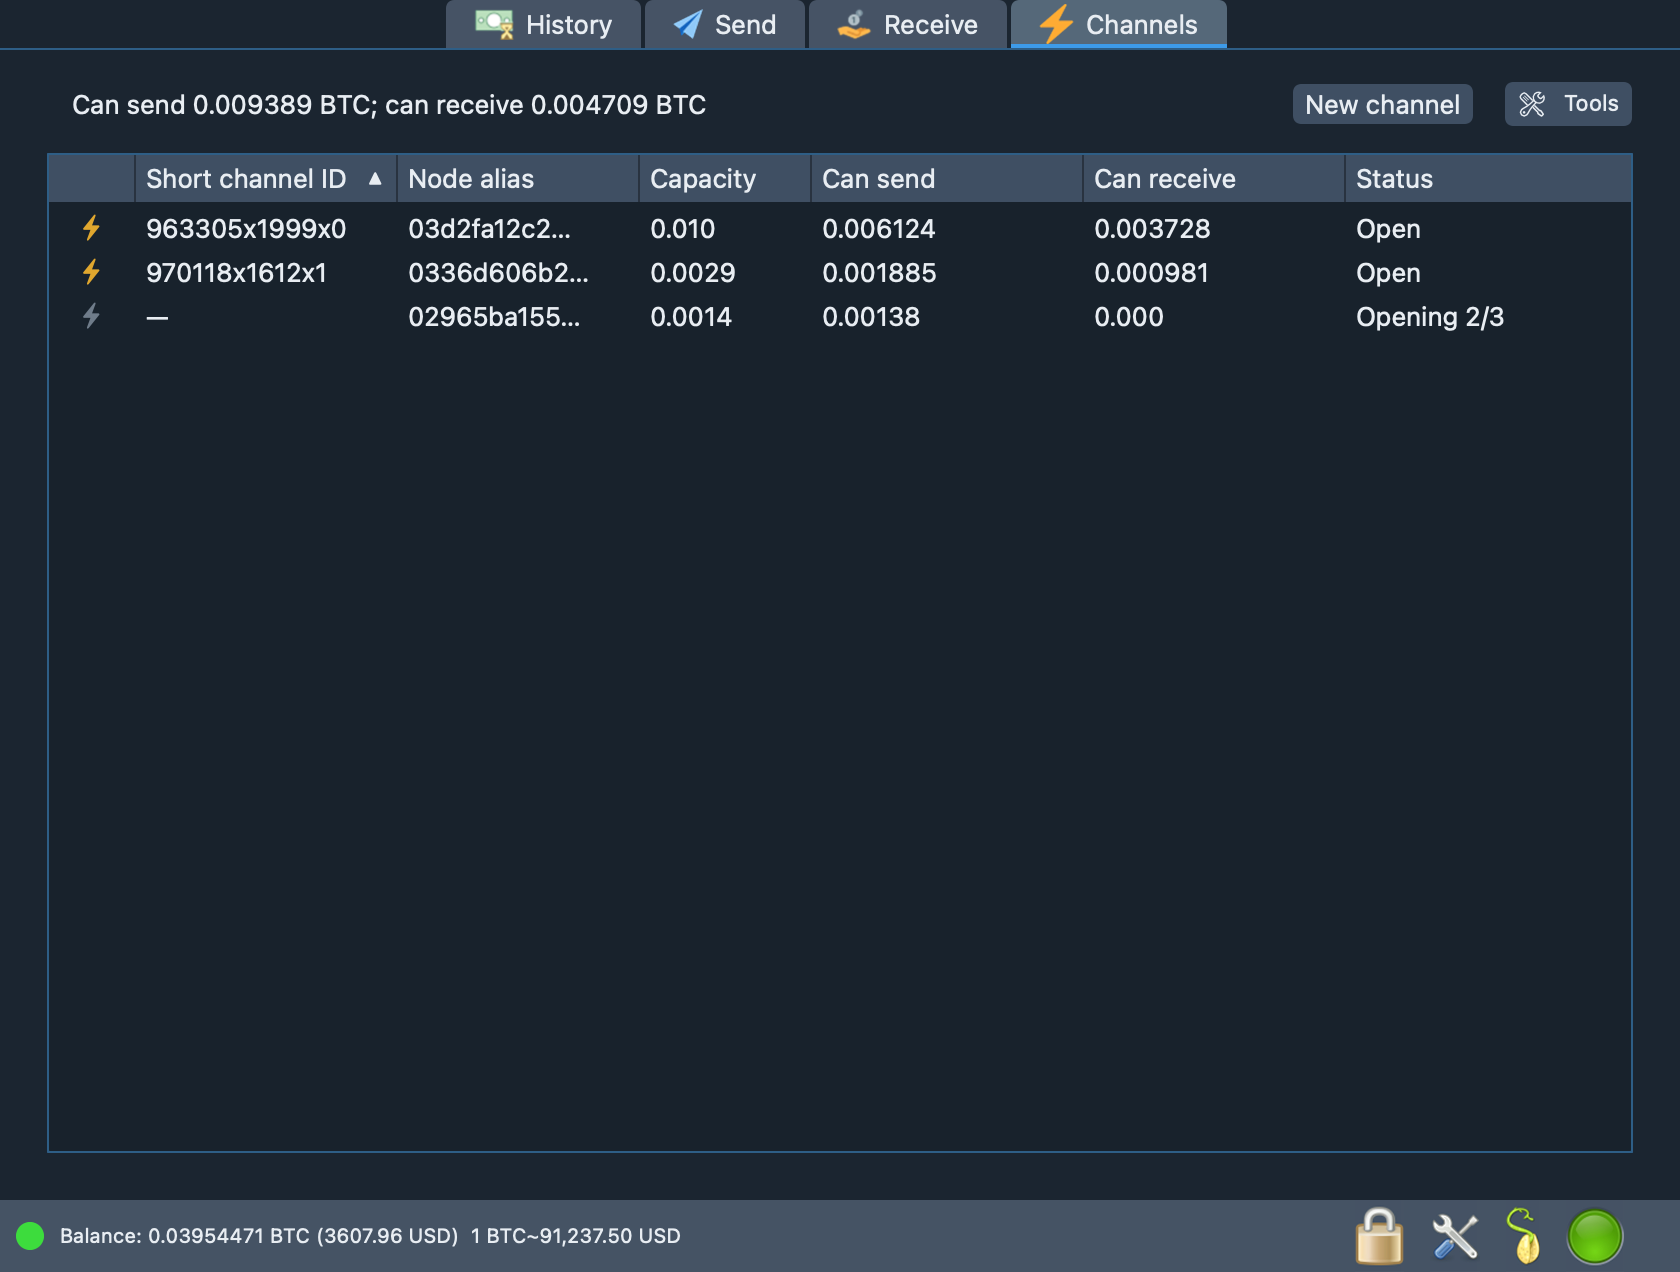
The Channels tab lists your Lightning channels with capacity and the amounts you can send and receive. New channel opens a channel to a node ID you enter, funded from the Lightning balance that you top up from the main wallet. Closing a channel returns the funds on-chain.
This version manages channels only. Sending and receiving Lightning payments is not available yet. Do not delete the node’s data folder while a channel is open.
The status bar
| Control | What it does |
|---|---|
| Coloured dot | Connection state: green connected, orange synchronising, red offline. Click it for a balance breakdown (confirmed, unconfirmed, Lightning). |
| Padlock | Change the wallet password. |
| Wrench | Settings: language, units, currency and rate source, block explorer, Lightning node, delete wallet. |
| Seed icon | Show the seed phrase (asks for the password). |
| Globe | Network: automatic or manual server, proxy. |
Network and privacy
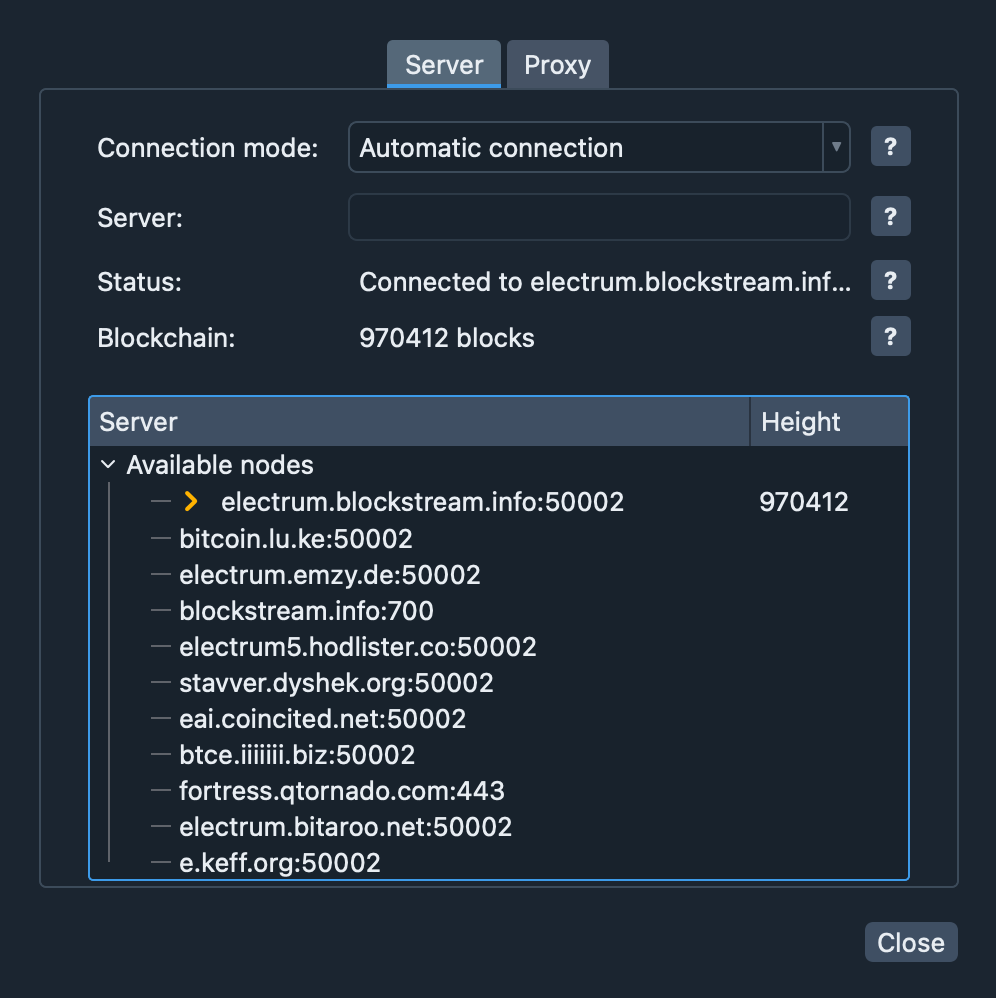
By default the app connects to a public Electrum server automatically. In the Network
window you can pick a server by hand (host:port), use your own node, or send all traffic
through a SOCKS5 or HTTP proxy such as Tor.
What the servers can see is explained on the Security page.
Try it without any funds
You do not need bitcoin to look around. Create a wallet with Import Bitcoin addresses and
enter a public address that has history, for example the first-ever address
1A1zP1eP5QGefi2DMPTfTL5SLmv7DivfNa. Selectrum will synchronise it and show its transactions,
balance and details; nothing can be spent because there are no keys.
To see the receiving side, create a standard wallet and make a request on the Receive tab.
Troubleshooting
- Status bar says “Not connected”. Check your internet connection and the proxy settings in the Network window; try a different server.
- Balance stays at “Synchronizing…”. The first sync of a busy wallet can take a few seconds to a minute; the counter in the status bar shows progress.
- “Wrong password”. Passwords are case-sensitive. If it is lost, restore the wallet from its seed phrase.
- A payment is stuck. It stays unconfirmed until a miner includes it; low-fee payments can wait. Choose a faster fee policy next time.
- I want to remove the wallet from this Mac. Settings → Wallet → Delete wallet. Make sure the seed phrase is written down first.
More questions? Read How it works or the security model.